

Jewelry engraving might look intimidating at first, but it all starts with just a handful of affordable tools and a clean workspace. Most people are surprised to learn that you can personalize gold, silver, or even steel jewelry at home without investing in expensive equipment. The real eye-opener? Choosing the right tools and preparing your surface makes all the difference, and you do not need to be a professional to end up with a piece that looks like it came from a high-end boutique.
Table of Contents
- Step 1: Gather Your Tools And Materials
- Step 2: Select Your Jewelry And Design
- Step 3: Prepare The Jewelry Surface
- Step 4: Transfer Your Design To The Jewelry
- Step 5: Engrave Your Design With Care
- Step 6: Clean And Inspect The Finished Piece
Quick Summary
| Key Point | Explanation |
|---|---|
| 1. Gather essential engraving tools | Use a rotary engraving tool with adjustable speed for versatility and precision in designs. |
| 2. Select appropriate jewelry materials | Choose metals like silver or gold for intricate designs, considering their durability and engraving response. |
| 3. Carefully prepare the jewelry surface | Clean the piece thoroughly and create a smooth surface to ensure high-quality engraving results. |
| 4. Accurately transfer your design | Use clear, high-contrast transfer methods and verify alignment multiple times before engraving. |
| 5. Maintain precision during engraving | Stabilize your jewelry piece well and use light, consistent pressure to avoid mistakes and damage. |
Step 1: Gather Your Tools and Materials
Beginning your jewelry engraving journey requires careful preparation and selecting the right equipment. Before diving into the intricate art of personalization, understanding the essential tools and materials will set the foundation for a successful engraving project.
For personal jewelry engraving, you’ll need several precision instruments. Your primary tools will include an engraving pen or rotary tool, which serves as the central instrument for creating detailed designs. Professionals recommend selecting a tool with adjustable speed settings and interchangeable tips to accommodate different materials and design complexities. The MIT Edgerton Center suggests choosing a high-quality rotary tool that provides consistent control and smooth movement.
Your materials selection is equally crucial. You’ll want to gather specific materials based on your jewelry type: sterling silver, gold, stainless steel, or alternative metals each require slightly different approaches. Prepare clean, smooth surfaces free from dirt or oils by using jewelry cleaning solutions and soft microfiber cloths. Additionally, acquire protective gear like safety glasses and work gloves to prevent potential injuries during the engraving process.
An ideal workspace for jewelry engraving should be well-lit, stable, and organized. Consider setting up a dedicated workstation with a non-slip mat or surface that allows you to secure your piece while working. Soft, adjustable lighting will help you see intricate details and maintain precision throughout your engraving project.
Below is a quick reference table summarizing essential jewelry engraving tools and their purposes, to help you prepare your workspace effectively.
| Tool/Material | Description | Purpose |
|---|---|---|
| Rotary engraving tool | Adjustable speed, interchangeable tips | Main instrument for detailed engraving |
| Safety glasses | Protective eyewear | Prevent eye injuries during engraving |
| Work gloves | Protective gloves | Prevent hand injuries from tools/materials |
| Jewelry cleaning solution | Non-abrasive cleaner for metals | Removes oils, dirt, and residue |
| Microfiber cloths | Soft, lint-free cloth | Cleaning and drying jewelry surfaces |
| Magnifying glass or jeweler’s loupe | High-magnification lens | Enhances visibility of small details |
| Secure non-slip work surface | Stable mat or pad | Keeps jewelry steady and prevents slipping |
Key tools you’ll need include:
- Rotary engraving tool with multiple tip attachments
- Safety glasses
- Work gloves
- Jewelry cleaning solution
- Microfiber cloths
- Magnifying glass or jeweler’s loupe
- Secure work surface with non-slip mat
By meticulously gathering these tools and preparing your workspace, you’ll create an optimal environment for transforming plain jewelry into personalized, meaningful keepsakes.
Step 2: Select Your Jewelry and Design
Selecting the perfect piece of jewelry for engraving transforms a simple accessory into a personalized treasure. This critical step requires thoughtful consideration of material, design complexity, and personal significance. Explore our guide on understanding jewelry for special occasions to help inspire your selection process.
Metal selection plays a crucial role in successful engraving. Different metals respond uniquely to engraving techniques. Sterling silver and gold provide smooth surfaces ideal for intricate designs, while stainless steel offers durability but might require more specialized tools. Consider the jewelry’s intended purpose and the recipient’s lifestyle when choosing your metal. Softer metals like pure silver allow for more delicate engraving, whereas harder metals demand more precise equipment and technique.
Design considerations extend beyond the metal type. The size and surface area of your jewelry piece significantly impact engraving possibilities. Smaller items like rings and pendants require precision and minimal text, while broader surfaces like bracelets or lockets accommodate more elaborate designs. Evaluate the available space carefully, measuring the potential engraving area and considering font size and complexity.
Personalization is the heart of jewelry engraving. Think about the message or design you want to immortalize. Names, dates, short quotes, or symbolic imagery can transform an ordinary piece into a meaningful keepsake. Sketch your design beforehand or use digital design tools to visualize the final result. This preparatory step helps prevent costly mistakes and ensures your vision translates effectively onto the jewelry surface.
Key design selection considerations:
- Available surface area
- Metal type and hardness
- Intended message or design
- Recipient’s personal style
- Long-term durability of the engraving
By carefully selecting your jewelry and design, you set the foundation for a beautifully personalized piece that will be treasured for years to come.
Step 3: Prepare the Jewelry Surface
Preparing your jewelry surface is a critical step that determines the quality and precision of your final engraved design. Explore our guide on understanding jewelry craftsmanship to gain deeper insights into proper jewelry preparation techniques.
Cleaning is the foundation of surface preparation. Begin by thoroughly removing any dirt, oils, or residue that could interfere with the engraving process. Use a specialized jewelry cleaning solution and a soft, lint-free microfiber cloth to gently clean the surface. Avoid using harsh chemicals or abrasive materials that might scratch or damage the metal. Professional jewelers recommend using alcohol-based cleaning solutions for metals like sterling silver and gold, as these effectively remove oils and provide a pristine surface for engraving.
After cleaning, you’ll need to create an optimal surface for engraving. Some metals require additional preparation techniques. For softer metals like silver, a light buffing with a fine-grit polishing cloth can help create a smooth canvas. Harder metals might need more specialized preparation, such as using a light etching solution or applying a temporary marking fluid that helps guide your engraving tool. The goal is to create a surface that allows your engraving tool to move smoothly and create clean, precise lines.
Careful surface marking is crucial for achieving a professional-looking result. Use a fine-tipped marker or specialized jewelry marking tool to lightly outline your design. This preliminary step helps prevent mistakes and provides a visual guide during the engraving process. Take your time with this step, ensuring your design is centered, aligned, and appropriately sized for the jewelry piece.
Use this checklist-style table to verify that your jewelry surface is fully prepared before engraving to achieve the best possible results.
| Preparation Step | Action Required | Check (✓) |
|---|---|---|
| Jewelry cleaned | Remove all oils, dirt, and residue | |
| Surface smoothed | Buff/polish as needed for metal type | |
| Design marked | Use fine marker or marking tool | |
| Alignment double-checked | Confirm design is centered and sized right | |
| Tools ready | Ensure all engraving tools are set up |
Measure twice and mark carefully to avoid potential errors that could compromise the final design.
Key surface preparation steps:
- Thoroughly clean the jewelry piece
- Remove all oils and residue
- Create a smooth, even surface
- Carefully mark your design
- Double-check alignment and sizing
By meticulously preparing your jewelry surface, you set the stage for a precise, professional-looking engraving that will transform your piece into a personalized work of art.
Step 4: Transfer Your Design to the Jewelry
Transferring your design to jewelry requires precision and careful planning. Explore our collection of personalized gifts to understand the importance of design transfer in creating meaningful keepsakes.
Digital design preparation is your first critical step. Using graphic design software or specialized jewelry design applications, create a vector-based design that can be easily scaled and transferred. Choose fonts that are clear and readable, considering the limited space on your jewelry piece. Serif fonts often work best for smaller surfaces, providing crisp lines that remain legible even at tiny sizes. Professional designers recommend creating your design at a 1:1 scale to ensure accurate sizing and placement.
Multiple methods exist for transferring your design onto the jewelry surface. For metal pieces, transfer paper provides a straightforward approach. Print your design onto special transfer paper using a laser printer, then carefully position the paper on the cleaned jewelry surface. Apply gentle, even pressure using a burnishing tool or the back of a spoon to ensure the design transfers cleanly. Some engravers prefer using temporary marking fluid or chalk-based marking solutions that create a visible outline without permanently staining the metal.
Precision is paramount when positioning your design. Use measuring tools like digital calipers or jewelry alignment guides to center your design perfectly. Small alignment errors can dramatically impact the final aesthetic of your engraved piece. Take multiple measurements from different angles, ensuring the design sits exactly where you want it. For circular items like rings, consider using a ring mandrel to help maintain consistent positioning. Create light pencil marks or use removable alignment tape to guide your engraving process, giving yourself visual reference points.
Key design transfer considerations:
- Ensure design is correctly scaled
- Use high-contrast transfer methods
- Verify design alignment multiple times
- Choose transfer method compatible with metal type
- Practice on scrap material first
By meticulously transferring your design, you transform a conceptual idea into a tangible, personalized piece of jewelry ready for the next stages of engraving.
Step 5: Engrave Your Design with Care
Engraving jewelry requires a delicate balance of technical skill and artistic precision. Learn more about creating meaningful anniversary gifts to understand the emotional significance behind personalized jewelry.
Positioning your jewelry is crucial for successful engraving. Secure the piece using a non-slip mat or specialized jewelry holding clamp to minimize movement during the engraving process. Professional engravers recommend using multiple stabilization points to ensure the piece remains absolutely steady. If working with smaller items like rings or pendants, consider using a ring mandrel or dedicated jewelry vice that allows you to rotate the piece while maintaining its position.
Choose your engraving tool and technique based on the metal type and design complexity. Rotary tools with diamond-tipped or carbide bits work exceptionally well for harder metals like stainless steel and gold. For softer metals such as silver, adjust your tool’s speed and pressure to prevent deep or uneven cuts. Start with light, consistent pressure, making multiple gentle passes rather than attempting to engrave deeply in a single stroke. This approach provides greater control and reduces the risk of accidentally damaging the jewelry piece.
Maintain a steady hand and consistent movement throughout the engraving process. Practice proper body positioning to minimize hand fatigue and potential slip-ups. Rest your engraving hand on a stable surface, creating a pivot point that allows for smoother, more controlled movements. Some experienced engravers recommend using a magnifying lens or jeweler’s loupe to enhance visibility and precision, especially when working on intricate designs or smaller surface areas.
Key engraving technique considerations:
- Use appropriate tool for metal type
- Maintain consistent, light pressure
- Stabilize jewelry piece securely
- Work in multiple gentle passes
- Take breaks to prevent hand fatigue
By approaching the engraving process with patience and precision, you transform a simple piece of jewelry into a personalized treasure that tells a unique story.
Step 6: Clean and Inspect the Finished Piece
After completing your engraving, the final step transforms your raw work into a polished, professional piece. Discover meaningful gift ideas that celebrate personalization to appreciate the artistry behind customized jewelry.
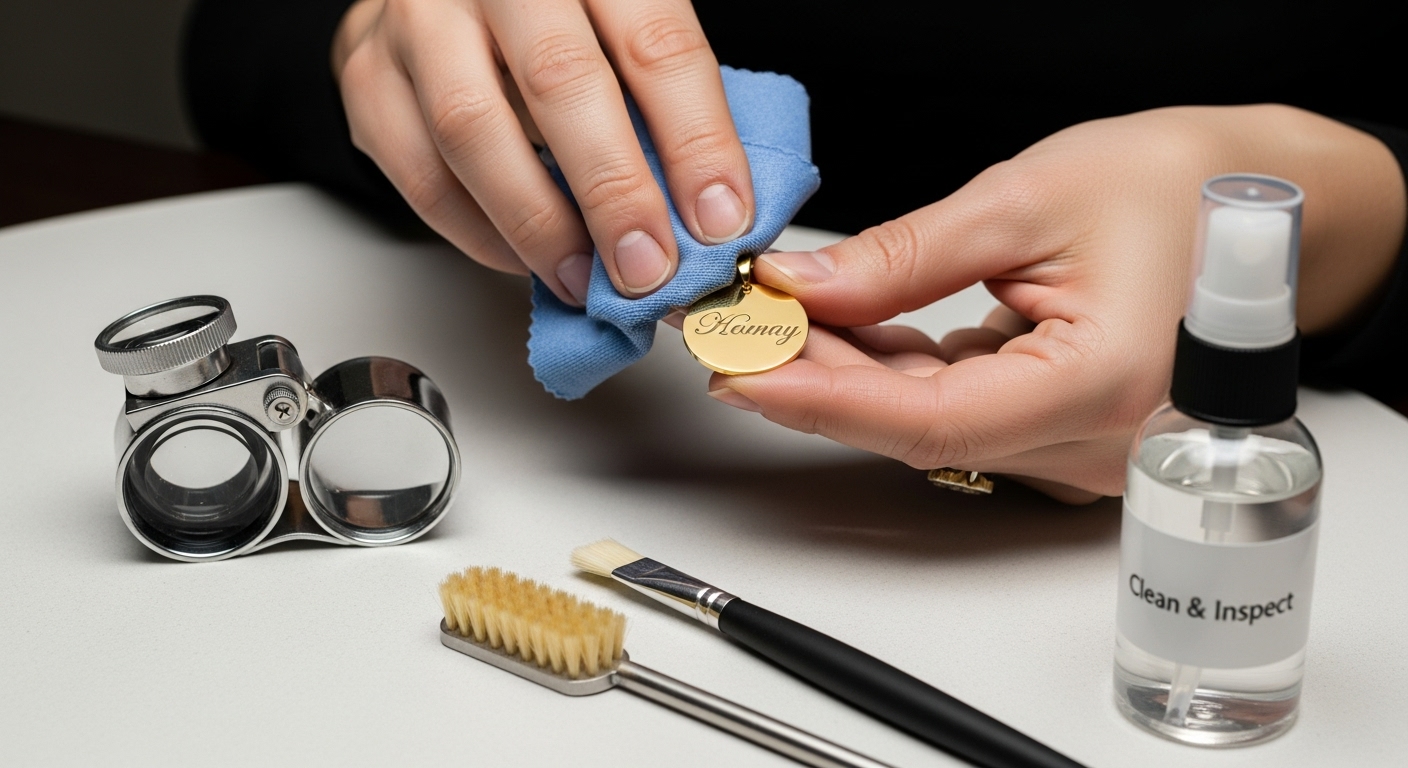
Initial cleaning requires a gentle touch. Professional jewelers recommend using a specialized jewelry cleaning solution designed for your specific metal type. Prepare a small bowl with lukewarm water and a few drops of mild, non-abrasive soap. Dip a soft, lint-free microfiber cloth into the solution and carefully wipe the engraved surface, removing any metal shavings, dust, or residual marking fluid. Avoid using paper towels or rough cloths that might scratch the delicate engraved areas. For intricate designs, use a soft-bristled brush like a clean, unused makeup brush to gently clean hard-to-reach crevices.
Careful inspection is crucial to ensure the quality of your engraving. Examine the piece under bright, direct lighting, preferably using a jeweler’s loupe or magnifying glass to catch minute details. Look for consistent depth in your engraving lines, checking that the design maintains even pressure and clean edges. Pay special attention to any potential rough spots or uneven areas that might require additional refinement. Some engravers recommend taking high-resolution photographs of the piece to review the work more meticulously, allowing you to spot imperfections that might be difficult to see with the naked eye.
Finishing touches can elevate your engraved piece from good to exceptional. Consider using a jewelry polishing cloth specifically designed for your metal type to add a final shine. For silver pieces, a silver-specific polishing cloth can help restore luster and remove any minor oxidation. Stainless steel and gold pieces might require different polishing techniques, so always research the specific care requirements for your chosen metal. Store the finished piece in a soft, clean jewelry pouch to protect the newly engraved surface from potential scratches or environmental damage.
Key final inspection and cleaning steps:
- Use gentle, metal-specific cleaning solutions
- Inspect under bright, direct lighting
- Check for consistent engraving depth
- Polish with appropriate cloth
- Store in protective packaging
By meticulously cleaning and inspecting your engraved jewelry, you ensure a professional finish that transforms a simple piece into a treasured keepsake.
Make Your Jewelry Personal – Without the Hassle
You care about creating something unforgettable. After reading our step-by-step guide to engraving jewelry, you know just how much skill, precision, and time is needed to get it right. Maybe you want to craft a message only you can give, but the risks of scratches, uneven lines, or tools slipping can feel overwhelming. So many people imagine beautiful engraving ideas, but struggle to make them a reality on precious necklaces or rings.
Why struggle through trial and error when you can bring your meaningful vision to life with experts who specialize in custom keepsakes? At Treasured Tale Store, we handle everything from careful design to flawless engraving. Whether you dream of an anniversary date on a bracelet or a heartfelt message for Mom, our personalized gifts help you celebrate every moment, stress-free. Explore our collection of personalized jewelry today and let our team turn your inspiration into a beautiful gift they will treasure forever. Create a personal gift with confidence right now. Visit Treasured Tale Store and place your order today for fast service and heartfelt results.
Frequently Asked Questions
How do I select the right tool for jewelry engraving?
Choosing the right tool involves selecting an engraving pen or rotary tool with adjustable speed settings and interchangeable tips. Look for high-quality options that provide control and smooth movement for detailed designs.
What materials can I engrave on jewelry?
You can engrave on various materials including sterling silver, gold, stainless steel, and alternative metals. Each material may require specific engraving techniques and tools for optimal results.
How should I prepare the jewelry surface before engraving?
Ensure the jewelry is thoroughly cleaned to remove dirt and oils. Use a specialized jewelry cleaning solution and a microfiber cloth. For some metals, additional preparation like light buffing or applying marking fluid may be necessary.
What techniques can I use to ensure precise engraving?
Maintain a steady hand and use consistent light pressure while engraving. Position your piece securely using a non-slip mat or jewelry holder. Practice multiple gentle passes instead of deep cuts, and consider using a magnifying lens for better visibility.